I came into this class having already read start up books on photography, watching intro DVD's that came with my camera when i boughtit, and I frequently photography magazines. So it was a little frustrating for me to start from the begining. I know as a teacher it has to be frustrating when kids come into the class with a point and shoot and not know what shutter speed is. I did benefit alot from this class, but it wasn't from the book ( i did try to read it but couldn't handle it). Where i benifited was when i met with you after class and got to bring up and discuss photography on a higher level then "this is what a DSLR is".
Learning how to clean sensors, and blow the dust out of the camera is something valuable that i learned. Watching someone do it is a lot better then reading about it in a book. Then the trick you showed us on how to inspect the senor by taking a picture of the sky and zooming in, is a technique i will remember and use.
My favorite thing i learned this year was how to create a HDR photo. I did alot almost too much of this, but i will walk away with the skill of being able to capture a landscape and make it look amazing with out making it look too fake. I love this kind of photography and i would not have learned it if i did not take this class.
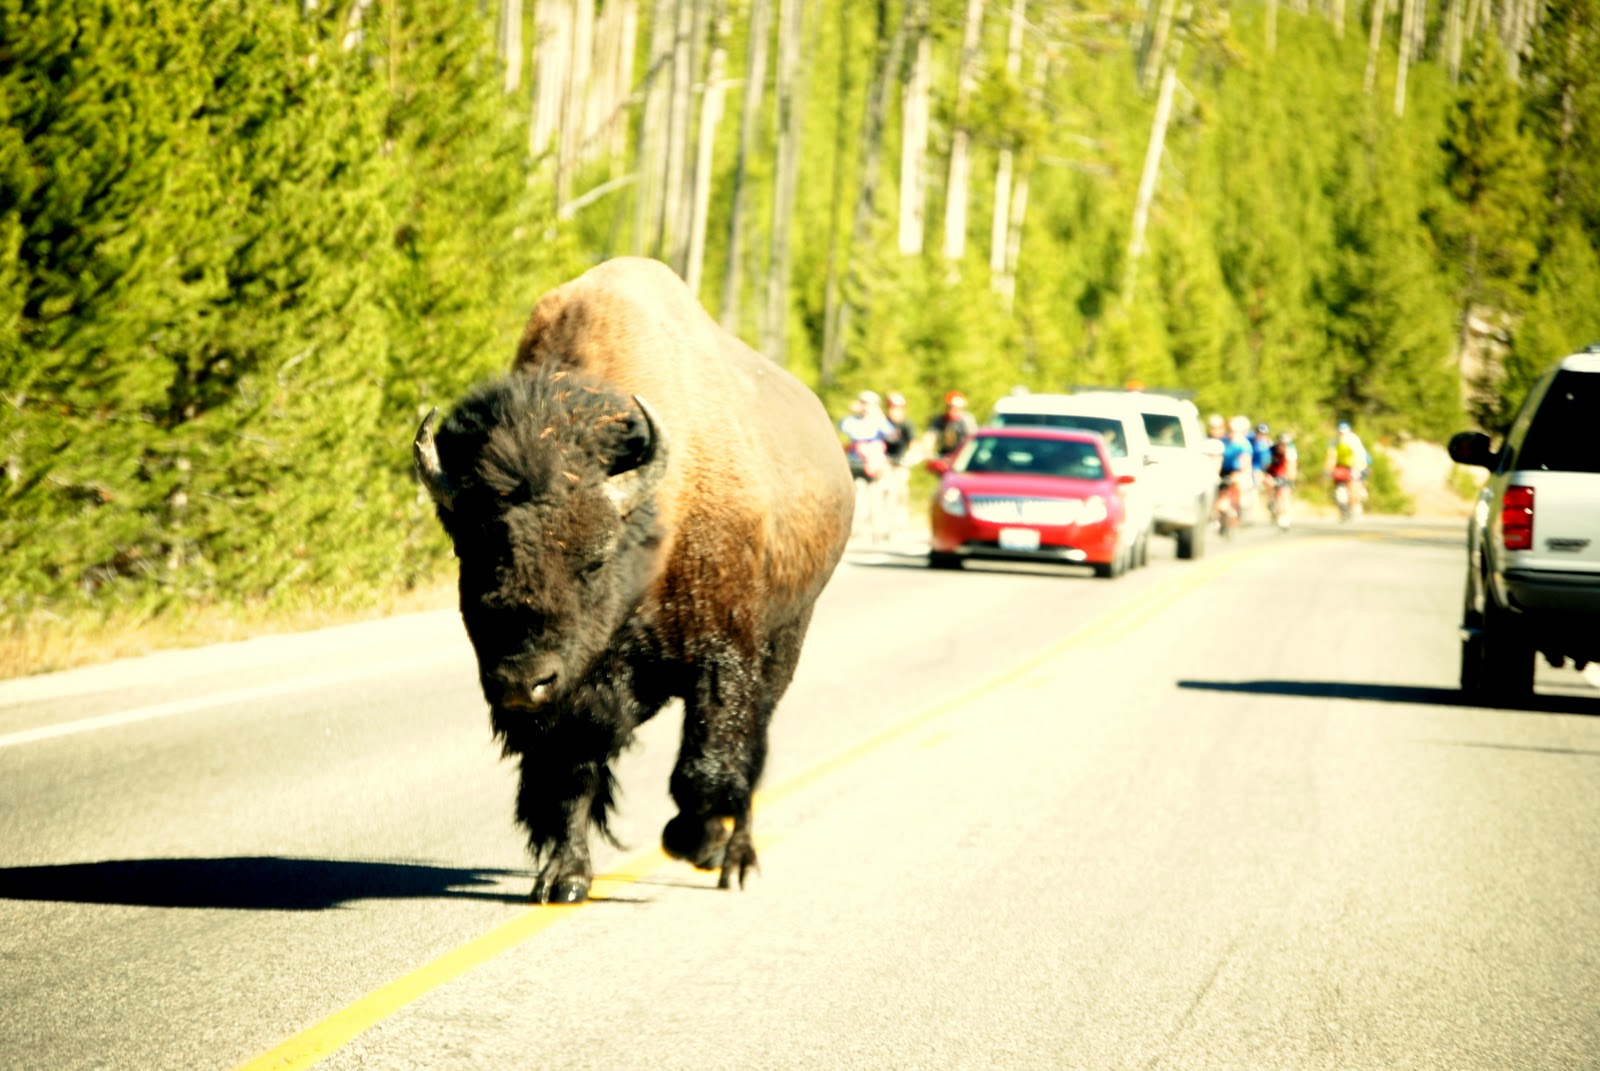
Learning how to use photoshop is also something that is going to help me later on. I know i spend most of class working on my sisters senior pictures, but i feel like that is more challenging then putting a squirrel on the empire state building like others did. I think mastery of the software is messing with someones face on photoshop and not making it look fake. If you can do that, then you are ready to cut a piece of grass off of a bison.
Being exposed to the different type of lens out there was helpful too. I now have a better idea of what i want to get when i get some money to put in it. A nice telephoto is on that wish list for sure. this class did do a good job of teaching me what my camera does not have such as exposure bracketing. I will be better prepaired to buy that stuff when the time comes now.
I learned alot about ethics in photography. You did a good job of disscussing both sides and you did not come across as if you were trying to tell us what is right and what is wrong. talking about the photographers who fake their pics or who shoot at zoo's does kind of make you ask the question if what they are doing is right and if it should be able to compete against a photographer who sits in a swamp getting malaria for six months.
I did enjoy this class, at the same time it was frustrating for me. I think there should be an upper level photography class that sets some limits on what kind of camera you have (no point and shoots), and if you have already taken the intro to photography course. I am aware that I did not complete all the journal entries. I did try, but I decided my other classes were more important then writing 5 paragraphs on each chapter. that seems like a little much, and that book was pretty much stating stuff that i already knew because i did take the intro class, i have read intro books, and watched intro DVD's on photography. I know that is a terrible attitude to have as a student. I am human, and my limited attention span does get the best of me. I feel like even though i didn't buy the book i took more away from this class then a majority of the class. Looking at some of the kids final pictures kind of made me wonder if they knew their camera had a mode other then auto. For example pictures of the sky during the day with ISO numbers in the thousands? What i did learn will stick with me, and i will use it forever. All in all i did like this class, i just felt like it would have been better if it had some prerequisites and if there was no book.
Sunday, December 5, 2010
FINAL PROJECT

1st expouser= 1/30 s, F/14,ISO200, 28mm FL
2nd expouser= 1/10s, F14,ISO200, 28mm FL
3rd expouser= 1/60s, F14, ISO200, 28mm FL

1st expouser= 1/60 s, F/4.8,ISO400, 100mm FL
2nd expouser= 1/30s, F4.8,ISO400, 100mm FL
3rd expouser= 1/200s, F4.8, ISO200, 100mm FL

1/60s
F/11
ISO100
145mm FL

1/1000s, F/16, ISO100, 55mm FL

1st expouser= 1/125 s, F/13,ISO100, 95mm FL
2nd expouser= 1/40s, F13,ISO100, 95mm FL
3rd expouser= 1/320s, F13, ISO100, 95mm FL

1st expouser= 1/100 s, F/13,ISO100, 105mm FL
2nd expouser= 1/320s, F13,ISO100, 105mm FL
3rd expouser= 1/30s, F13, ISO100, 105mm FL

1/3200s, F/5.6, ISO200, 200mm

1/160th's, F 5.6, ISO100 200mm FL

1/1000s, F/5.6, ISO100, 100mm


1/800s, F/18, ISO200, 200mm


1/500s, F/11, ISO268, 200mm

1/50s, f6.3, ISO 268, 185mmFL

1/1600s, F5.6, ISO100, 200mm FL


1/80's, F6.3, ISO268, 157mm FL

This was just a random HDR one i took. I do like how it is set up with the diagonals running through it which are then cut apart by the vertical trees.

1/60's F9, ISO268, 55mm FL

1/640s, F5.3, ISO268, 165mmFL

1/400s, F32, ISO100 155mmFL

1/800s, F8, ISO268, 120mm FL

1/200s, F5, ISO400, 145mm FL
Wednesday, December 1, 2010
chapter three
This section was about wild life photography. It was about getting close to the animals you are trying to shoot, thinking ahead so you get the right shot of the animal you want, and setting up the shoot so you have all the right layers in it. You want the animal to be posing in an attractive position that some one would want to publish.
Chapter two!
First part of this chapter talks about getting the proper exposure in your pictures. It mentions using the histogram to make sure capture all the proper levels in your picture. It also talks a lot about using the different exposure modes on your camera such as aperture priority, shutter, program, and manual. This reading is some what boring for me because i did watch the free DVD's that came with my camera, so this chapter sounded like a stuck record to me. The stuff about depth of field i already knew about. The info on the lighten was kind of interesting, but i must say i have already read some books on lighten and i am fairly aware of it. I do have my own speed light that i carry in my bag. I am how ever some what of a greenhorn when it comes to using filters. I own a polarizer, but i really need to invest in some neutral density filters.
Chapter one! i finally barrowed a book!
The first chapter of this book discussed what gear to bring. The author talked alot about what basic features you want your camera to have, the significance of a tripod, how your next step should be a telephoto lens, followed by a super telephoto lens and the importance of having back up gear. Then he went into what to wear when out in the field and basic common sense stuff like that. followed by sharing some good places to shoot in north America and what time to shoot in them.
Thursday, October 28, 2010
The D3000
This week i am blogging about my nikon D3000. I would most likely not reccomend this camera to most people. only those on a really limited budget. My camera cost about $700 for everything. including one 18-55mm and one 55-200mm lens. One problem with the 55-200mm is that it does not come with vibration reduction which most of nikons 55-200mm do. This camera is very limited as far as which settings you would like to use. I really wish it had expouser bracketing and i all around more options. It is user friendly, but this is mostly due to the limited amount of settings on it. It also does not have a live view feature so getting low angle shots gets a little tricky.
I have taken a far amount of pictures with my camera and it does do okay for a beginner camera but it does leave the user after about a year wanting more options. I added a 500 dg super flash to my camera and that helps it a fair amount. I was able to shoot some of my little sisters senior portraits this year and they turned out ok. This camera was good for getting a taste for photography, but still leaves a lot to be desired.
I have taken a far amount of pictures with my camera and it does do okay for a beginner camera but it does leave the user after about a year wanting more options. I added a 500 dg super flash to my camera and that helps it a fair amount. I was able to shoot some of my little sisters senior portraits this year and they turned out ok. This camera was good for getting a taste for photography, but still leaves a lot to be desired.
Thursday, October 21, 2010
10-21-10 article 2
For this i read and article on Landscapes It was called "Special Techniques". It was pretty interesting. The first thing he talks about in it is how to shoot a black and white. He did a good job of explaing when it is appropriate to shoot black and white, and also the pros and cons of shooting with your camera on black and white or just going in later with software and making it black and white.
The next thing he went into was HDR photos. I really like taking HDR pictures and he had some good adivce to give on that. the advice includded when it was appropriot to take an HDR, the pros and cons, how to set your camera up for it, what software to use, and how much of a differecne in F-stops you should use. I have been using mostly 1 stop, but he recommend experiment with 1.5-2 stops.
He then went into to talking about panoramics and how to stitch the pictures together. Setting up the panoramic was interesting too. he talk about how you need to keep the interest up in the people who are looking at it. You do this by not having dead space and keep interesting things in it from one side to another.
10-21-10 article 1
The First artcile i read was titled "On the wing". What it was about is how to get good bird shots. The photographer writing this article was big into staging things.I did pick up some pretty nifty tricks, but i could never see myself putting as much work into taking pictures of birds like he does.
He gave advice about how he took a picture of a kingfisher. They are a really shy bird and it is really tricky getting a good shot of them. So what he did was set up a blind and let it sit there for three days. They he also went out into the pond that the kingfisher was fishing in and set a poll up. He attached a perch to this poll. He was still having problems getting the kingfisher to use the perch so he bought a kiddie pool and put minows in it. He then ran into the problem of the kingfisher eating all the minows before the lightning was right. So he then attached a piece of fabric over the top of the kiddie pool that he could remove by pulling some fishing line when the lightning was right. That seems like alot of work just to get a picture of a kingfisher to me.
Next he goes on to explain how to get a good hummingbird picture. For this what he did was set up a feeder to get the birds to come, then he would set up about six flashes, putting some on the bird, some coming down on top of the bird and two on his background. For the background he would set a print of blurred out greenery he would then light it. The biggest challenge with taking a picture of a humming bird is to get their wings in focus since they flap so fast. So by using all the flashes he could get enough light so that he could use a fast shutter speed on them and still have the background bright and the details of the bird bright.
Tuesday, September 21, 2010
This weeks Blog

This week i am blogging about how i have been trying to improve my HDR pictures. I have been experiementing by setting my expouser by more then one F stop. I have been going up to two stops, and i have been using my polarizer. I tried to take some HDR's of the nice sunset we had the other day, I really wanted to capture the detail of the sunset along with the detail of the street i was shooting on. One of the problems i ran into was there was a lot of cars driving by on the street, so by the time I got all three expousres there was multiple cars that drove by. I also found out that the HDR software i am using does not like bright head lights. This created dark spots in my image.

I also tried to take another one on this rims this week. Last time i took a landscape of the rims the clouds made it dark and scary. One of my friends commented on facebook that it reminded him of a bad dream. So i tried to lighten the mood by taking one with a little more sun light and a little bit brighter clouds. I like how this one turned out. The composition is attractive to me.
This weeks asignment

My first photo is a example of diagonal lines are better then verticle. The lines shift upwards and pull your eyes to the clouds above. I shot these from the rims. Using HDR I was able to get the beams of sunlight to light up and i was able to get the clouds nice and clear.

My second picture is an example of using light is better then dark to get depth in my picture, I took an HDR of the clouds that were about me and used a high aperture setting to achieve the deep depth of focus. By making my F stops far apart for my 3 expousers I was able to get the dark and light contrast to be a lot more noticeable.

My third photo is another HDR photo and its is using the Sharp is better then blurry element. I did this by a high aperture and adjusting the contrast to make the layers of the cloud distinct.
Wednesday, September 15, 2010
First attempt lightning shots
 This week I am blogging about my first attempts at taking pictures of lightning, This tuesday we had a pretty big lightning storm roll through the magic city. I was out on a run when it started so I hurried back to my room so I could grab my car and head up to the rims. By the time I had arrived at the spot I would be shooting at, the storm had really picked up and was starting to get really intense. I quickly set my camera up on my tripod and started shooting. It was really windy and rainy outside so I had to take that into consideration while taking the pictures. I used the bulb mode on my camera and counted down for five seconds, any longer then that then the wind would start really messing with the clearness of my shot. I left my aperature at about F8, and I tried my best to sheild my camera from the wind and rain. I luckly enough had a plastic grocery bag siting in my car that I was able to hold over my camera.

 I ended up taking about 150 shots, i would hold my shutter open until I saw some lighting or until five seconds was up, then i would quickly start taking my next picture. This method worked well but did take a lot of time. I was fortunate that the storm was big and had a lot of strikes. I wanted to stick around and take some more pictures but unfortunately I was unable to. The storm was west of me then got blown east right over the top of me. I took off running when the tree right next to me got hit by the lighting. It felt like someone shot a 308 rifle in my ear. I felt really awkward running through a lightning storm soaking wet, and with a metal tripod in my hand.
Thursday, September 9, 2010
First attempt at HDR photos


Thursday, September 2, 2010
#2 weekly blog
 This week I decided to blog about Shaun Lunt. Shaun Lunt was a doctor/pilot/photographer. Most of his pictures were taken up in Alaska where he spent a lot of time exploring. Shaun Lunt would go on long trips in his super cub exploring the back country of Alaska, it is what he loved to do. Looking at the pictures Shaun took is a little eerie, because Shaun died in a plane crash back in 2008. He was circling a whale vertebrae when he stalled and went into a spin. a lot of his pictures were taken right before he was killed. Shaun's pictures are mostly landscapes of the beautiful Alaskan wilderness, he also has a lot of pictures of aircraft. He was very good at documenting his journey through photography. By looking at his online journal you can really get a feel for what he experienced on his trips.
I would not mind getting better at taking the kind of photos Shaun took. Since I am also a pilot I am hoping to have some of the same opportunity's Shaun had. I would really enjoy having enough money to be able to afford to leave work for a couple months and do what he did (minus the dieing part).
http://shaunlunt.typepad.com/shootings/
Thursday, August 26, 2010
my first blog
I have chose to blog about Greg du Toit. I came across this photographer while on face book one day and the images he captured I found were easy to remember. What makes his pictures interesting to me is the amount of work and dedication he put into capturing the images he did. Greg du Toit really wanted to get images of lions drinking out of a watering hole, he wanted a low angle shot with a wide angle lens so he could get the whole pride in the shot. The method in which he chose to get these pictures was to be almost completely submersed in a parasite infested watering hole and wait. It took him months to capture the images he set out to get. While he was waiting for these lions he contracted several types of parasites, some of which he could see through his skin moving around, and he contracted malaria twice.
 http://www.dailymail.co.uk/news/worldnews/article-1253935/Photographer-captures-amazing-images-lions-watering-hole-submerging-months.html

Subscribe to:
Posts (Atom)